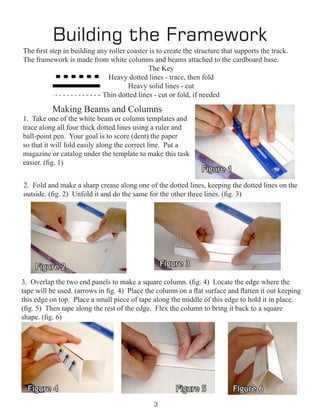
Creating an exciting and engaging experience using simple materials can be a delightful challenge. This guide is designed to take you through the process of crafting a dynamic pathway that harnesses the power of gravity. Whether for a school project or a fun activity, this endeavor combines creativity with basic principles of physics, resulting in a thrilling outcome.
As you embark on this journey, you’ll discover how to transform everyday items into an interactive construction. With step-by-step guidance, you’ll learn how to shape and assemble components that come together to form a fascinating structure. The result is not just a visually captivating display but also a tangible demonstration of motion and speed.
This guide is structured to ensure that both beginners and more advanced creators can successfully bring their vision to life. By following these instructions, you’ll master the art of creating a pathway that is both intricate and functional, providing endless opportunities for customization and experimentation.
Building Your Paper Roller Coaster: A Step-by-Step Guide
Crafting your own gravity-powered thrill ride from everyday materials can be an exciting and educational experience. This guide will walk you through the process of creating a miniature track system, ensuring each segment fits perfectly and allows your marbles or balls to navigate with ease. The goal is to help you understand the basics of design and construction, offering a hands-on way to explore physics and creativity.
Step 1: Gather Your Supplies
To start, you’ll need sturdy paper, scissors, glue, and a ruler. Optional items include tape for extra stability and a pencil for marking precise cuts. These basic items will serve as the foundation for your structure.
Step 2: Create the Base
The base is the foundation that supports your entire setup. Cut a piece of cardboard or thick paper large enough to hold the entire structure. This will provide stability and prevent your design from tipping over during use.
Step 3: Design the Track Segments
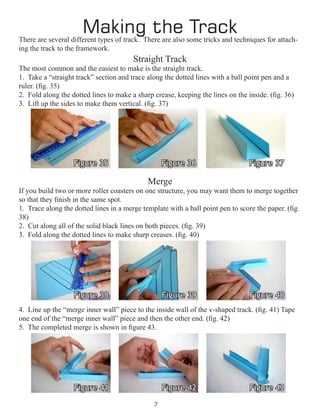
Using your paper, cut out strips that will serve as the pathways for your marbles. You can create straight paths, loops, and curves by folding and shaping the paper. Make sure to test each piece by rolling a small ball down it to ensure smooth movement before attaching it to the base.
Step 4: Assemble the Structure
Start building your design by attaching the track segments to the base. Use glue to secure each piece in place, holding it until the adhesive sets. Begin with the highest points and work your way down, making sure each section flows seamlessly into the next.
Step 5: Test and Adjust
Once the construction is complete, test your creation by sending a marble down the path. Watch how it moves and look for any areas where it might get stuck or slow down. Make adjustments as needed, tweaking the angles and reinforcing sections to improve performance.
With patience and creativity, you can build a fun and functional track system that provides endless enjoyment. This project not only entertains but also enhances your understanding of physics and engineering principles.
Materials Needed for a Paper Roller Coaster
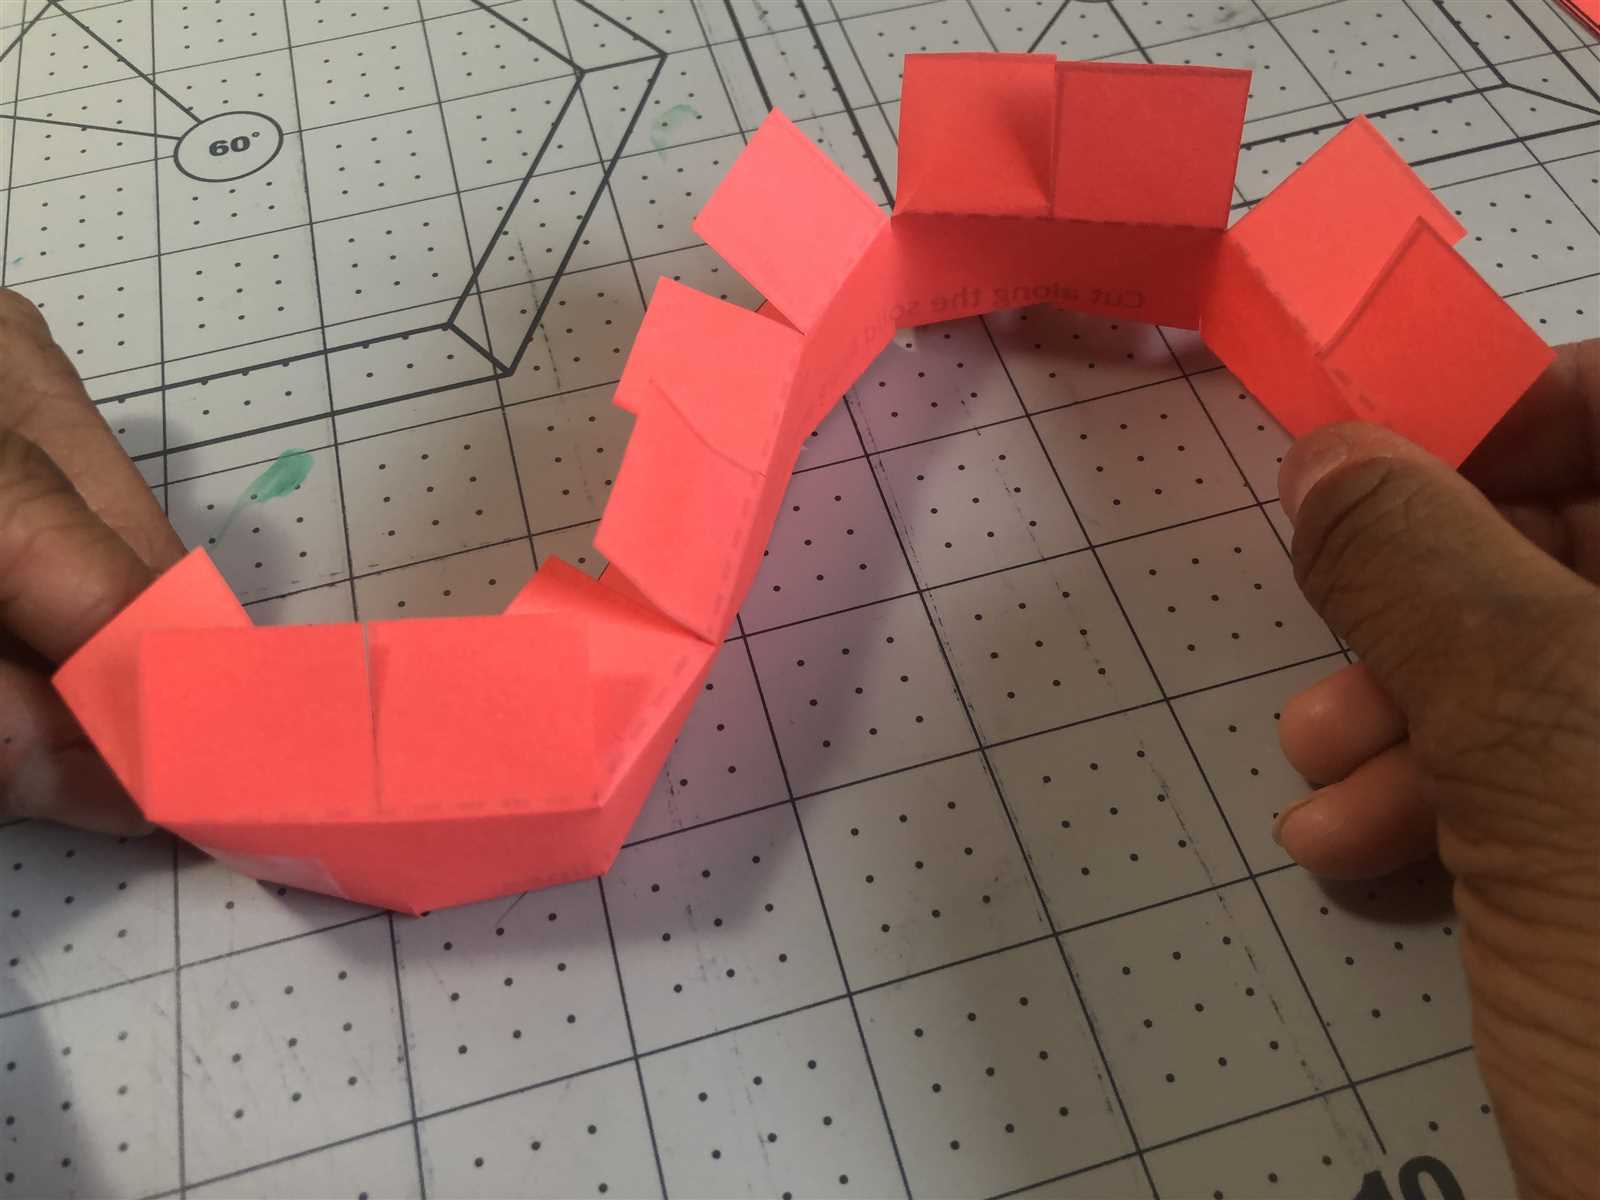
Creating a dynamic track structure requires various supplies that ensure stability, creativity, and functionality. This section highlights the essentials you’ll need to bring your imaginative paths to life, making sure the paths are sturdy and the journey is thrilling.
Basic Building Supplies
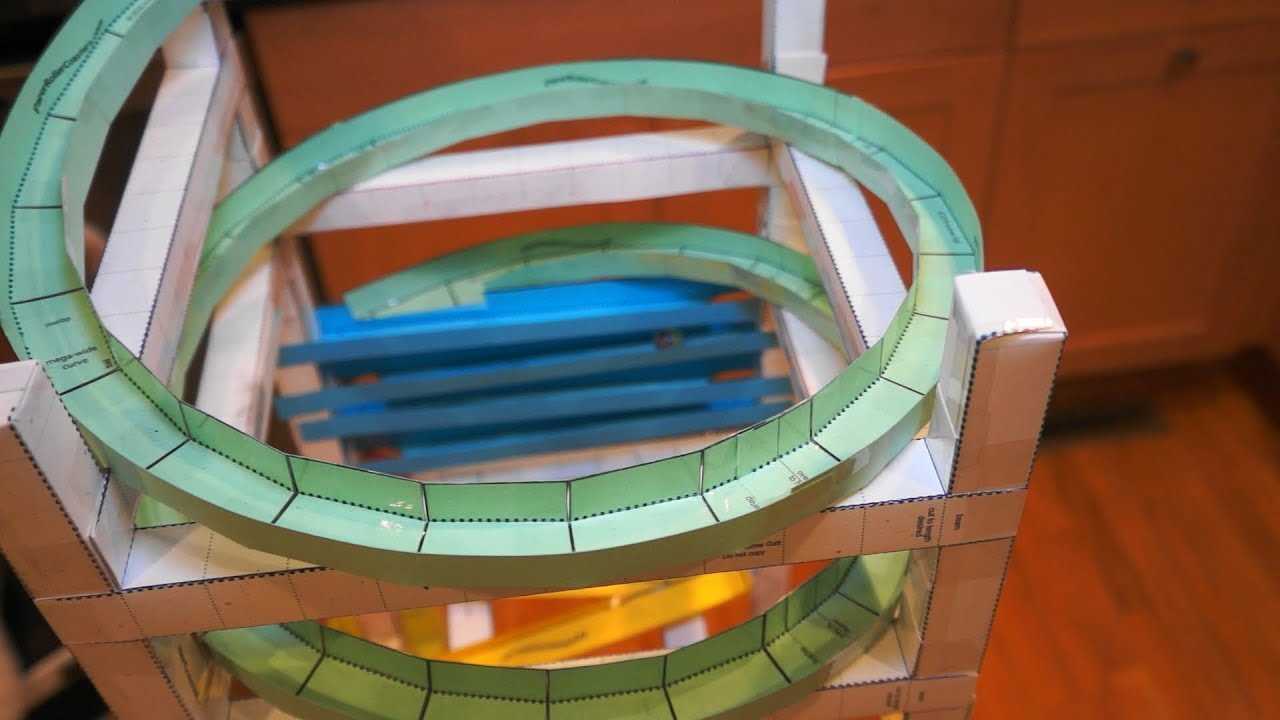
To start constructing, you will need some fundamental items. These include durable sheets for forming the pathways, sturdy support beams to keep everything in place, and a reliable adhesive to bind all parts together. Scissors or a cutting tool will also be necessary to shape your materials accurately.
Decorative and Functional Elements
For a visually appealing and functional design, additional items are recommended. Colorful markers or paints can be used to decorate the tracks, while small weights may be helpful to balance certain sections. Tape can serve both as a functional adhesive and a decorative element to add character to the project.
| Item | Purpose |
|---|---|
| Durable Sheets | Forming the pathways and loops |
| Support Beams | Providing structural stability |
| Adhesive | Binding various components |
| Cutting Tool | Shaping materials |
| Color Markers | Adding decorative designs |
| Tape | Reinforcing connections and adding style |
| Small Weights | Balancing the structure |
Designing the Layout for Maximum Fun
Creating an engaging and thrilling setup is key to ensuring an exciting experience. By thoughtfully planning the path, you can craft a sequence of twists, turns, and surprises that will keep participants entertained. The secret lies in balancing complexity with creativity, ensuring that each segment seamlessly transitions into the next, providing a satisfying flow from start to finish.
Incorporate Dynamic Elements
To elevate the excitement, consider integrating dynamic components that can surprise and delight. Elements like sudden drops, tight curves, and loops can add an element of unpredictability, making the experience more thrilling. These features encourage anticipation and keep interest high, as each part of the path offers a new challenge or a moment of exhilaration.
Balance Speed and Control
Achieving the right mix of speed and control is crucial for a fun-filled experience. While rapid descents can create a rush of adrenaline, incorporating sections where the pace slows down allows for moments of suspense and enjoyment of the surroundings. Use ramps, gentle inclines, and strategic barriers to manage the velocity, ensuring a safe yet exciting journey from beginning to end.
Creating Tracks: Tips and Techniques
Designing intricate paths requires creativity and precision. The art of building these pathways lies in understanding the balance between gravity and momentum. By carefully shaping curves and inclines, you can influence the speed and direction, making the journey more engaging and dynamic. The key is to experiment with different angles and materials to discover what works best.
To start crafting your pathways, consider the following guidelines to enhance your design:
| Technique | Tip |
|---|---|
| Curved Paths | Use gentle arcs to create smooth transitions. Steeper curves can be used for quick direction changes but may require more structural support. |
| Inclined Sections | Incorporate gradual slopes to control the acceleration. A sudden drop can add excitement but might need additional stabilization. |
| Support Structures | Reinforce longer paths with pillars or braces. This will ensure stability and prevent the structure from collapsing under the weight. |
| Material Choices | Experiment with different types of materials to find the right balance of flexibility and strength. The material should bend without breaking and provide enough friction to control speed. |
By experimenting with these techniques, you can create complex and exciting paths that captivate and challenge. Remember, the key to success is patience and a willingness to iterate on your designs. Adjustments and refinements will lead to a more enjoyable and stable creation.
Securing the Structure: Stability Matters
When creating a dynamic and engaging track design, ensuring the stability of the entire framework is essential. A well-balanced construction prevents unexpected collapses, enhancing both safety and performance. This section focuses on how to effectively secure your model, emphasizing techniques that fortify the entire build and maintain its form even under the strain of continuous use.
Key Anchoring Points
Identifying and reinforcing critical anchoring points is vital to the overall durability of your design. Areas where components meet or overlap often experience the most stress, making them prime spots for reinforcement. Consider using additional support elements such as bracing or weighted bases at these junctions to distribute the load more evenly. Secure these spots with strong, reliable materials to prevent movement and maintain a steady form.
Using Supportive Structures
Incorporating supportive structures can significantly enhance the longevity and reliability of your creation. Use columns, beams, and cross-braces strategically to bolster the integrity of the build. Ensure that the base is wide and sturdy, as this provides a solid foundation that can handle the weight of the entire configuration. The placement of these supports should be planned carefully to maximize their effectiveness.
| Area of Structure | Recommended Support | Purpose |
|---|---|---|
| Junction Points | Additional Bracing | Reduces stress and prevents bending |
| Base | Weighted Bases | Increases overall stability |
| Vertical Supports | Columns | Provides height stability |
Implementing these strategies will help ensure that your creation remains stable and robust, allowing for an enjoyable experience and minimizing the need for constant adjustments. By prioritizing stability from the beginning, you can focus more on the fun and less on troubleshooting structural issues.
Testing and Troubleshooting Your Roller Coaster
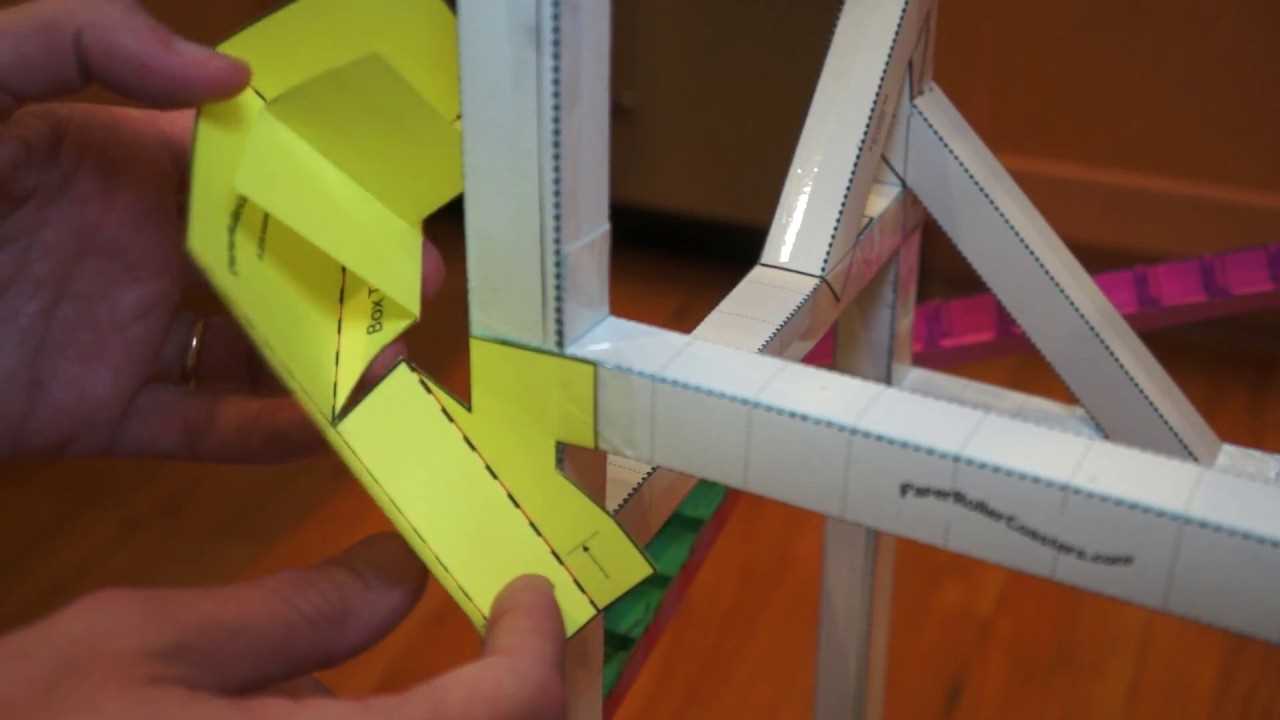
Ensuring that your intricate track system functions smoothly involves a few essential steps. Begin by conducting a thorough examination to verify that all components are securely assembled and correctly aligned. This will help in identifying any potential issues that could disrupt the flow and performance of your setup.
Initial Evaluation
Start by running a series of test runs to observe the system in action. Pay close attention to any irregular movements or misalignments. It’s crucial to check that all segments are properly connected and that no parts are obstructing the path. If any issues arise during these tests, note them down for further adjustments.
Common Issues and Solutions
One common problem is inadequate movement due to friction or misalignment. If you notice such issues, ensure that the track pieces are correctly placed and that there are no obstructions. Lubricating the moving parts might also help reduce friction. Additionally, ensure that any supporting structures are stable and securely fastened to prevent any unwanted shifts or wobbles.
Adding Finishing Touches for a Professional Look
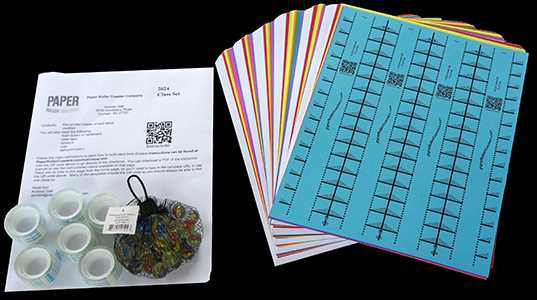
To achieve a polished and professional appearance, it’s important to consider a few final adjustments and enhancements. These details not only improve the overall aesthetic but also ensure that every element is well-integrated and visually appealing. Focusing on these finer points can transform your creation from a simple model to a striking display piece.
One key aspect to consider is smoothing the edges. Carefully trim any uneven or rough parts to create a clean, seamless look. Using tools like a fine-tipped marker