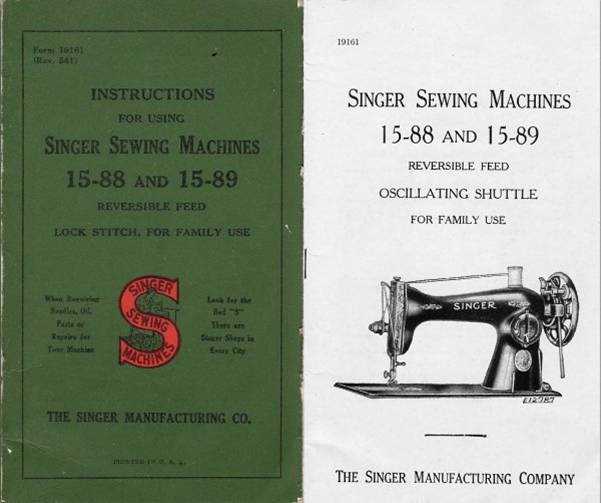
Mastering the art of sewing involves more than just creativity and a steady hand. It requires a comprehensive understanding of the machine itself, especially when dealing with classic models that have stood the test of time. The 15-91 model is one such machine, renowned for its reliability and robust construction. For those who wish to make the most of this timeless device, it is crucial to delve into the intricacies of its functionality and upkeep.
With its vintage appeal and precision engineering, the 15-91 has captivated the hearts of both novice and experienced sewing enthusiasts. However, to fully harness its capabilities, one must be familiar with the various features and settings that it offers. From threading techniques to tension adjustments, understanding these elements can significantly enhance your sewing projects, ensuring both efficiency and quality in every stitch.
Moreover, maintaining the longevity of this classic model requires more than occasional use. Regular cleaning, proper lubrication, and careful handling are essential practices that keep the machine running smoothly for years to come. By gaining insight into the correct care procedures, users can preserve the machine’s optimal performance and continue to create beautiful, handcrafted pieces without interruption.
Overview of the Singer 15-91 Sewing Machine
The 15-91 model is a renowned household sewing tool known for its durability and precision. This particular machine is celebrated for its exceptional build quality and the ability to handle a wide range of fabrics, making it a favorite among both novice and experienced crafters. Its timeless design and robust mechanics have made it a reliable choice for those looking to perform detailed stitching and various sewing tasks with ease.
Key Features and Construction
One of the standout characteristics of the 15-91 is its direct drive motor system. This feature eliminates the need for a belt, resulting in a smoother and more consistent sewing experience. The machine’s powerful motor allows it to sew through multiple layers of fabric, including thicker materials like denim and leather, without skipping stitches or causing jams. This makes it particularly suitable for heavy-duty sewing projects.
The 15-91 is built with a solid metal frame, ensuring its longevity and stability during operation. The machine’s all-metal gears contribute to its reliability, as they are less likely to wear out compared to plastic components found in more modern models. The robust construction not only enhances the machine’s lifespan but also ensures a steady performance, providing accurate stitching for years to come.
Ease of Use and Versatility
This sewing tool is designed with user-friendly features that make it accessible to sewists of all skill levels. The simple, intuitive controls allow for easy adjustment of stitch length and tension, accommodating a variety of sewing techniques and styles. Its versatility is further enhanced by a range of compatible presser feet and attachments, which enable users to expand their creative possibilities and take on more complex projects.
Additionally, the machine’s design includes an integrated light that provides ample illumination of the working area, making it easier to see fine details and reducing eye strain. This thoughtful feature is particularly helpful for intricate stitching or when working with dark fabrics.
In summary, the 15-91 model is a powerful and reliable sewing machine that offers exceptional versatility and ease of use. Its solid construction, combined with a strong motor and user-friendly features, makes it an ideal choice for a wide range of sewing needs, from basic repairs to elaborate creative projects.
How to Set Up Your 15-91
Setting up your 15-91 machine is a straightforward process that ensures optimal performance and longevity. This guide will walk you through each step, from preparing your workspace to threading and getting your machine ready for sewing. By following these steps, you will be able to start your projects efficiently and avoid common issues that may arise during use.
First, choose a stable and flat surface to place your machine. A sturdy table or desk is ideal to prevent any vibrations or movement while sewing. Ensure there is enough space around the machine for fabric movement and for comfortably accessing the handwheel and other controls.
Next, plug the machine into a power source. Ensure the power cord is securely connected to both the machine and the electrical outlet. Check the foot controller connection as well; it should be properly attached to the machine to allow smooth speed control. Turn on the machine using the power switch located on the side.
Once powered on, install a needle appropriate for your fabric type. Carefully insert the needle into the needle clamp, ensuring it is positioned correctly with the flat side facing the correct direction. Tighten the needle clamp screw securely to hold the needle in place.
After installing the needle, prepare the bobbin. Wind the thread onto an empty bobbin using the built-in winder, ensuring the thread is evenly distributed. Place the wound bobbin into the bobbin case, following the correct orientation to ensure smooth operation. Insert the bobbin case into the machine’s bobbin holder, and pull the thread through the designated slot to position it correctly.
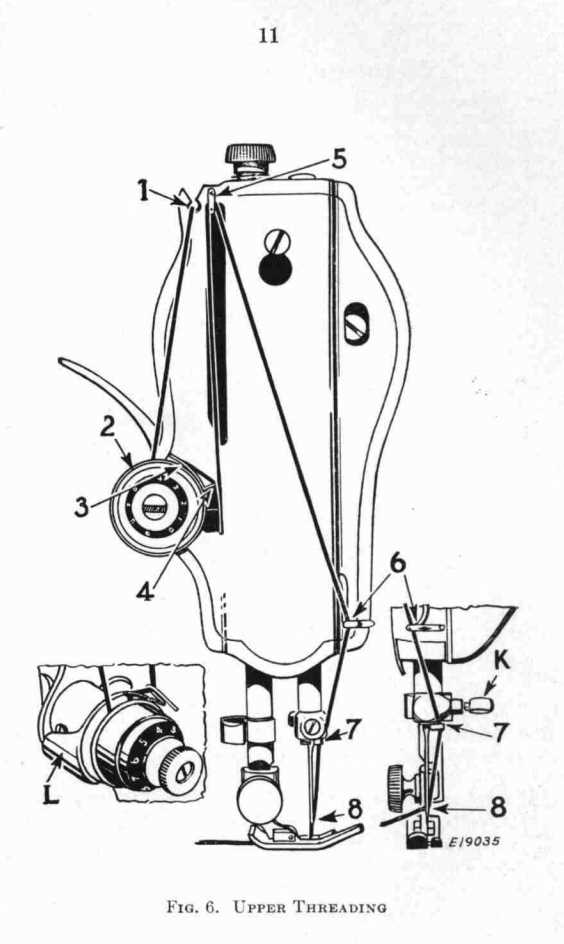
Now, it’s time to thread the upper part of the machine. Begin by placing the thread spool on the spool pin and guiding the thread through the thread guides according to the threading path. Make sure the thread passes through the tension discs and the take-up lever. Finish by threading the needle from front to back.
To prepare for sewing, hold the upper thread with one hand and rotate the handwheel towards you to lower and then raise the needle. This motion will pull the bobbin thread up through the needle plate. Pull both threads towards the back of the machine, leaving a few inches of thread to start sewing.
With your machine set up, you are now ready to begin your sewing project. Always test on a scrap piece of fabric to check the tension and stitch quality before starting your main work. Regularly clean and maintain your machine to ensure it continues to operate smoothly and efficiently.
Threading the Needle and Bobbin
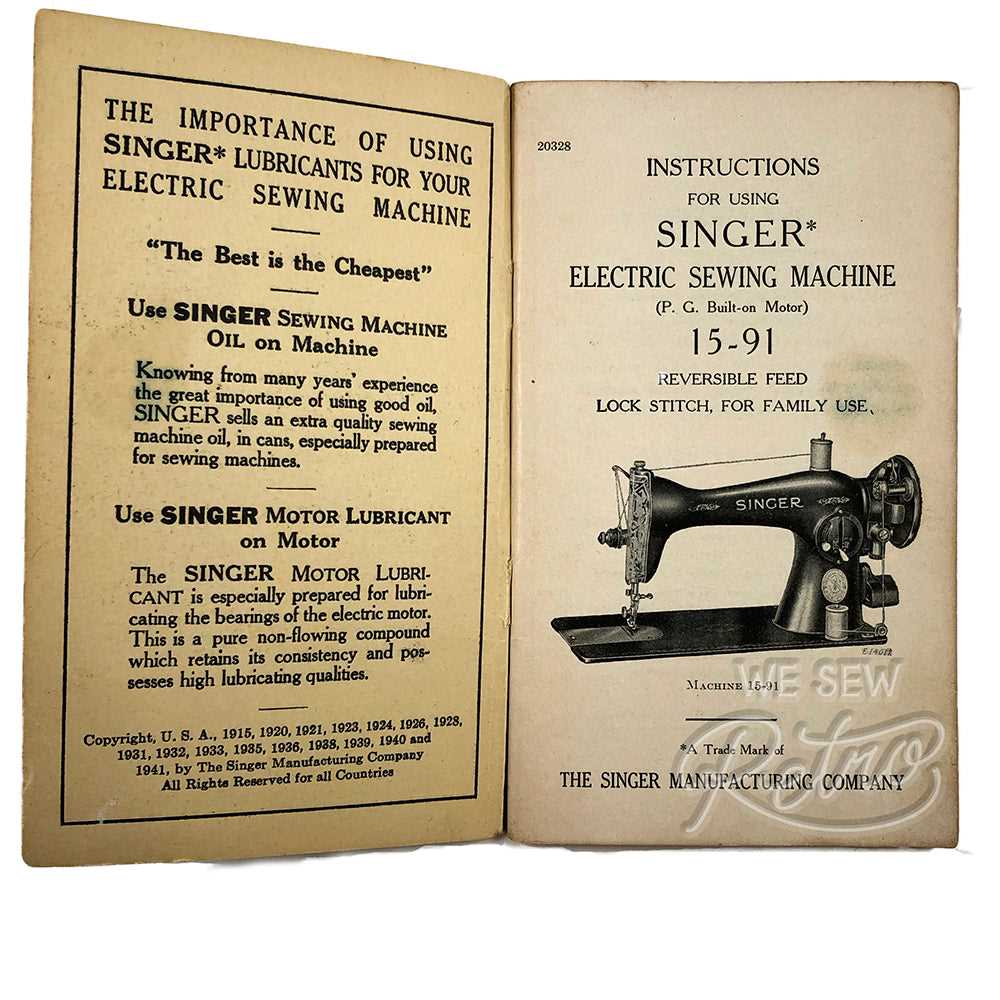
Properly threading both the needle and the bobbin is essential for smooth and efficient sewing. Ensuring that both are correctly threaded will prevent common issues like skipped stitches, thread jams, or uneven stitching. This process requires attention to detail and a bit of practice, but with the right approach, it becomes a simple routine.
Preparing the Upper Thread
Begin by placing the spool of thread on the spool pin, making sure it unwinds smoothly. Pass the thread through the various guides and tension discs according to your machine’s threading path. It is crucial to follow this path exactly to maintain the correct thread tension. Once you reach the needle, pull the thread through the eye from front to back. Using a needle threader can make this step easier, especially for those with limited dexterity or eyesight.
Winding and Inserting the Bobbin
To wind the bobbin, place an empty bobbin on the bobbin winder spindle and secure it. Thread the end of the thread through a small hole on the bobbin, then start the winder while holding the thread end to prevent slipping. Once the bobbin is fully wound, cut the thread and remove the bobbin from the spindle. Insert the bobbin into the bobbin case, ensuring that the thread is positioned in the correct direction and pulled through the tension spring. Proper placement is crucial to ensure a smooth feed of the lower thread during sewing.
By carefully threading both the needle and bobbin, you lay the foundation for flawless stitching. Taking the time to learn these steps will greatly enhance your sewing experience, making it more enjoyable and less prone to interruptions.
Basic Sewing Techniques with Singer 15-91
The 15-91 model is renowned for its versatility and durability, making it a preferred choice for both novice and experienced sewists. Understanding the essential techniques is crucial for creating professional-looking projects, whether you are crafting garments, home decor, or accessories. This section will guide you through fundamental practices to help you master your machine and achieve flawless results.
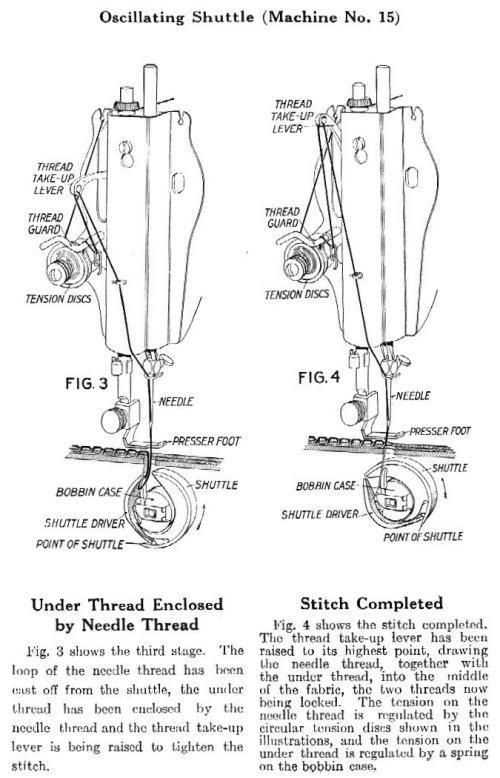
- Threading the Machine: Proper threading is the first step to a successful stitch. Begin by winding the bobbin, then guide the upper thread through the tension discs and thread guides, ensuring it is securely positioned. The bobbin should be placed in its case correctly, with the thread direction matching the manual’s recommendation.
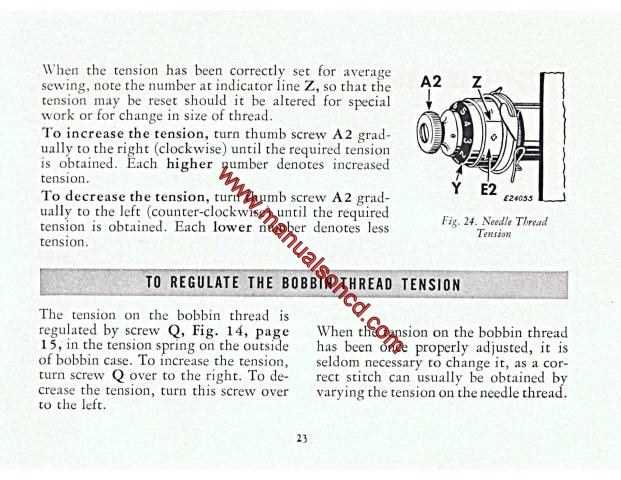
- Adjusting Tension: Balancing the tension between the upper thread and the bobbin thread is vital for even stitches. If the tension is too tight or too loose, it can cause puckering or uneven stitching. Adjust the tension dial gradually while testing on a fabric scrap to achieve the desired balance.
- Choosing the Right Needle and Thread: Selecting the appropriate needle size and thread type for your fabric is essential to prevent skipped stitches or fabric damage. For lightweight fabrics, a finer needle and lightweight thread are recommended. Heavier materials require a thicker needle and a strong, durable thread.
- Stitch Length and Type: The machine offers various stitch lengths, allowing you to customize according to your project. Shorter stitches are ideal for finer fabrics or seams that require extra strength, while longer stitches are suitable for basting or gathering. Familiarize yourself with the machine’s stitch options to expand your creative possibilities.
- Maintaining a Straight Seam: Keeping your fabric aligned while sewing is critical for a neat finish. Utilize the guidelines on the needle plate to maintain an even seam allowance, and practice controlling the fabric with both hands for steady stitching.
- Basic Troubleshooting: Occasionally, issues like skipped stitches, thread bunching, or needle breakage can occur. Learning how to quickly identify and resolve these common problems will save time and prevent frustration. Regular maintenance, such as cleaning lint from the feed dogs and oiling moving parts, also ensures smooth operation.
By mastering these foundational techniques, you can enhance your sewing skills and fully utilize the capabilities of your machine. Practice regularly and explore different materials and stitches to develop confidence and creativity in your sewing endeavors.
Maintenance Tips for Longevity
Proper care and regular upkeep are crucial for extending the life of your sewing machine. By following a few simple guidelines, you can ensure that your equipment continues to function smoothly and efficiently for years to come. Regular maintenance not only enhances performance but also prevents potential issues that could lead to costly repairs.
Keep It Clean
Dust and lint can accumulate quickly, particularly in and around the moving parts of your machine. Regularly clean the bobbin area, feed dogs, and needle plate to prevent build-up. Use a soft brush or a small vacuum attachment to remove debris, ensuring that all components remain unobstructed and free to move. A clean machine runs more smoothly and reduces wear and tear on its parts.
Lubrication is Key

Over time, the moving parts of your sewing machine require lubrication to function properly. Refer to your specific model’s maintenance guidelines to determine which areas need oiling and how often. Use only high-quality oil designed for sewing machines to avoid damage. A well-lubricated machine operates quietly and efficiently, reducing friction and preventing parts from wearing out prematurely.
Inspect and Replace Needles Regularly: Needles are one of the most important components of your sewing machine. They can become dull or bent after extensive use, leading to skipped stitches or fabric damage. Regularly check the condition of your needles and replace them as needed. A fresh, sharp needle ensures precise stitching and minimizes strain on your machine.
Store in a Safe Environment: When not in use, cover your machine to protect it from dust and moisture. Avoid storing it in damp or excessively hot areas, as these conditions can cause rust or damage to electronic components. A well-protected machine is less likely to suffer from environmental damage, keeping it in optimal condition for longer.
By incorporating these maintenance tips into your routine, you can ensure your sewing machine remains reliable and efficient. Regular care not only extends the life of your equipment but also provides a more enjoyable sewing experience, allowing you to focus on creativity rather than troubleshooting.
Troubleshooting Common Issues
Dealing with sewing machine challenges can be frustrating, but many problems have straightforward solutions. Understanding common issues and their fixes can help you get back to your sewing projects quickly. This section provides guidance on how to address frequent complications encountered with these devices.
Machine Not Sewing Properly

If your device is not stitching as expected, consider the following possibilities:
- Thread Tension: Incorrect tension settings can cause uneven stitching. Check the upper and lower tension settings and adjust them as needed.
- Needle Issues: A bent or dull needle can affect stitching quality. Ensure the needle is sharp and properly inserted.
- Thread Path: Verify that the thread is correctly threaded through the machine, including the bobbin area.
Machine Jamming or Skipping Stitches
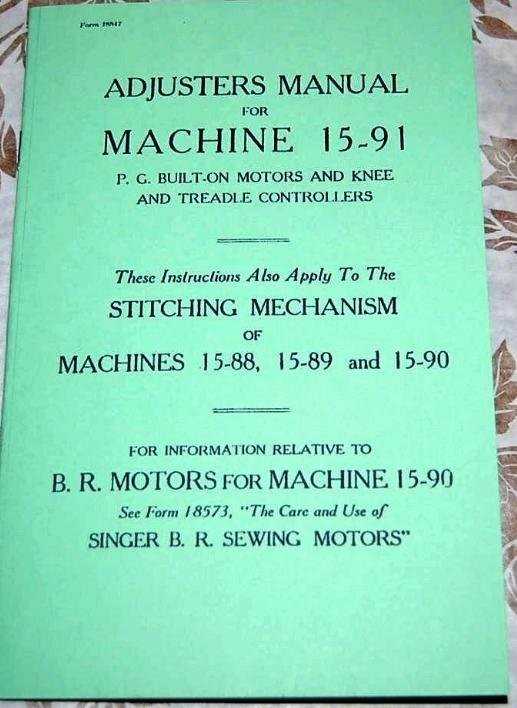
Frequent jamming or skipped stitches can disrupt your sewing. To resolve these issues:
- Bobbin Case: Ensure the bobbin case is properly seated and the bobbin is correctly threaded.
- Fabric Handling: Avoid pulling the fabric while sewing, as this can cause jams or missed stitches.
- Cleaning: Regularly clean the machine to remove lint and debris that might interfere with its operation.