Welcome to our detailed overview designed to help you get the most out of your V7 vacuum cleaner. This guide will walk you through everything you need to know, from setup to daily use, ensuring that you can maintain a clean and healthy living space with ease. Whether you’re a new owner or looking to refresh your knowledge, you’ll find all the essential information here.
In the following sections, we will cover a range of topics, including assembling your device, understanding its various components, and learning how to effectively utilize its powerful features. We’ll also provide tips for troubleshooting common issues and maintaining your cleaner for optimal performance. By the end of this guide, you’ll feel confident in handling your device and keeping your home spotless.
Mastering the use of your V7 vacuum cleaner can significantly improve your cleaning routine. With this guide, we aim to make your experience as smooth as possible, providing step-by-step instructions and valuable insights. Let’s dive in and explore how to make the most of this versatile cleaning tool.
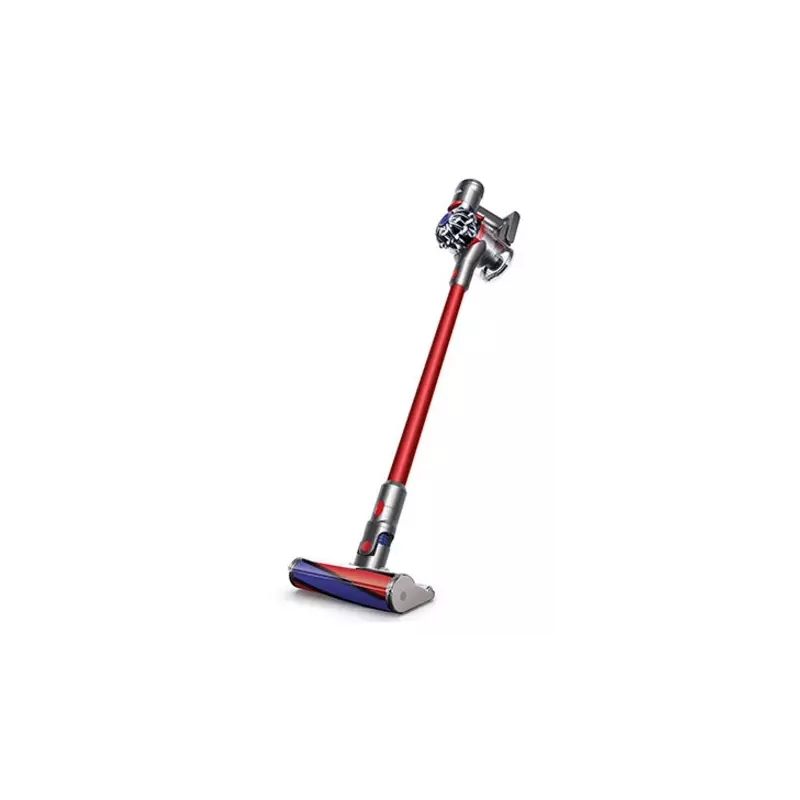
Overview of Dyson V7 Motorhead Features
The V7 cordless vacuum brings together innovative technology and user-friendly design to offer an effective cleaning solution. Its lightweight build and versatile accessories make it a reliable tool for a range of floor types and surfaces, ensuring a thorough cleaning experience. This section provides a closer look at the main attributes that enhance its performance and usability.
Powerful Suction and Long-Lasting Battery
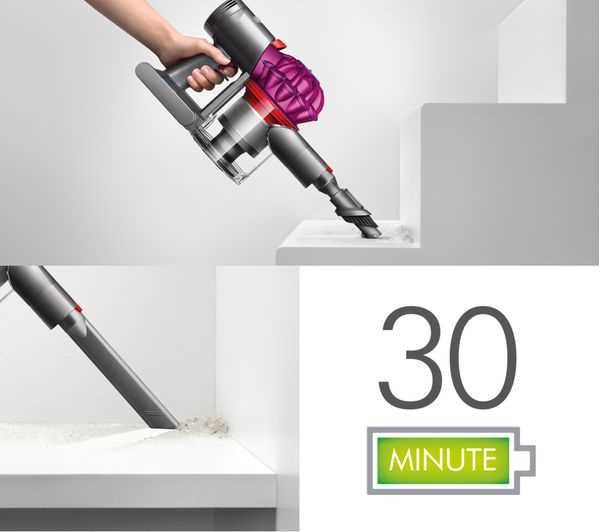
Equipped with a robust motor, this vacuum provides strong suction capable of capturing fine dust and large debris alike. The energy-efficient battery supports up to 30 minutes of fade-free cleaning, allowing you to cover large areas without interruption. For more demanding tasks, a MAX mode increases the suction power for up to 6 minutes, ideal for deep cleaning high-traffic areas.
Versatility and Convenience
With its range of interchangeable tools and attachments, the vacuum adapts easily to different cleaning tasks, from floors to upholstery to ceilings. Its easy-to-empty bin design minimizes contact with dust, while the ergonomic handle ensures comfortable use during extended cleaning sessions. Additionally, its wall-mounted docking station serves both as a storage solution and a charging station, ensuring the vacuum is always ready for the next use.
| Feature | Description |
|---|---|
| Run Time | Up to 30 minutes of fade-free power |
| Power Modes | Standard mode for regular cleaning, MAX mode for intensive tasks |
| Weight | Lightweight design for easy maneuverability |
| Bin Emptying | Hygienic one-touch bin emptying |
| Storage | Wall-mounted docking station for charging and storage |
Setting Up Your V7 Cordless Vacuum Cleaner
Getting started with your new cordless vacuum cleaner involves a few simple steps to ensure optimal performance from the start. This guide will walk you through the initial setup, including assembling the various parts and preparing the device for its first use. By following these instructions, you will be ready to keep your home clean and fresh with minimal effort.
To begin, let’s go over the steps required to assemble and prepare your new vacuum cleaner:
| Step | Action | Details |
|---|---|---|
| 1 | Unbox All Components | Carefully remove all parts from the packaging and lay them out to ensure all components are present. |
| 2 | Attach the Wand | Connect the extension wand to the main body by aligning the connections and pushing until you hear a click. |
| 3 | Install the Cleaner Head | Attach the appropriate cleaning head to the wand’s end by snapping it into place securely. |
| 4 | Charge the Battery | Plug the charger into a power outlet and connect it to the device. Let it charge for at least 3.5 hours before first use. |
| 5 | Check the Filter | Ensure that the filter is properly installed in the unit. Remove the filter, rinse it under cold water, and let it dry for 24 hours before reattaching if necessary. |
| 6 | Test the Suction Power | Turn on the vacuum cleaner and check the suction by running it over a small debris area. Ensure the device is functioning correctly before full use. |
By following these steps, your vacuum cleaner will be ready to tackle any mess, ensuring a clean and comfortable environment in your home. Regular maintenance and proper setup will extend the lifespan of your device and enhance its cleaning capabilities.
How to Use the V7 Attachments
The V7 comes with a variety of attachments designed to tackle different cleaning tasks. Understanding how to properly utilize these accessories will ensure efficient cleaning across various surfaces and hard-to-reach areas. Each attachment is crafted to address specific needs, from carpets and upholstery to tight corners and delicate areas.
Understanding Each Attachment
The vacuum includes several key tools. The crevice tool is ideal for reaching narrow spaces and cleaning between furniture. The combination tool features both a brush and wide nozzle, allowing for quick transitions between cleaning tasks. Meanwhile, the mini motorized brush is perfect for removing pet hair and dirt from upholstery and stairs. These tools help you maintain cleanliness in all parts of your home.
Attaching and Detaching Accessories
To attach a tool, simply align it with the end of the wand or handheld unit and push until it clicks into place. To remove, press the release button and gently pull the attachment away. This simple mechanism allows you to switch tools quickly while cleaning. Regularly inspect and clean your tools to maintain optimal performance and longevity.
Cleaning and Maintaining Your V7
Regular upkeep of your vacuum ensures optimal performance and longevity. This section provides essential tips on how to keep your device in top shape by properly cleaning its components and conducting routine maintenance. By following these guidelines, you can ensure your vacuum continues to operate efficiently, providing the best results for your cleaning needs.
Emptying the Dust Bin
To maintain strong suction power, it’s crucial to empty the dust bin when it reaches the max fill line. Hold the vacuum over a trash bin, pull the red lever upwards, and then press the button to release the base. This will open the dust bin, allowing debris to fall out. Close the base securely before using the vacuum again.
Washing the Filters
Filters should be cleaned at least once a month to ensure your vacuum remains effective at capturing dust and allergens. Remove the filter from the top of the device by twisting it counterclockwise. Rinse the filter under cold water until the water runs clear. Avoid using any detergents or washing machines. Allow the filter to dry completely for 24 hours before reinserting it into the device.
| Component | Cleaning Frequency | Instructions |
|---|---|---|
| Dust Bin | After Every Use | Empty the bin, then wipe with a dry cloth if necessary. |
| Filter | Monthly | Rinse under cold water and let air dry for 24 hours. |
| Brush Roll | Weekly | Remove tangled hair and fibers using scissors or a cleaning tool. |
By adhering to these cleaning and maintenance routines, your vacuum cleaner will remain reliable and efficient for years to come.
Common Issues and Troubleshooting Tips

When using your vacuum cleaner, you may occasionally encounter some challenges that can affect its performance. Understanding these common issues and knowing how to resolve them can help maintain optimal functionality and prolong the life of your device. This section will provide guidance on how to troubleshoot frequent problems and ensure smooth operation.
1. Loss of Suction Power
If you notice that the vacuum cleaner is not picking up dirt effectively, it could be due to a clogged filter or an obstruction in the hose. Check and clean the filter regularly, and remove any debris that may be blocking the airflow. Ensure all attachments are correctly fitted to prevent air leaks.
2. Unusual Noises
Unfamiliar sounds, such as rattling or high-pitched whines, might indicate an issue with the brush bar or a foreign object caught in the cleaner head. Inspect the brush bar for tangles and remove any obstructions from the cleaner head to prevent damage and reduce noise levels.
3. Overheating
If the vacuum shuts off unexpectedly, it may have overheated due to blocked airflow or a full dustbin. Turn off the device, unplug it, and allow it to cool down. Empty the dustbin, and clear any blockages before restarting to avoid future overheating.
4. Battery Issues
For vacuums powered by a rechargeable battery, reduced run time can be a sign of a worn-out battery or a need for recalibration. Fully charge the battery and let it run completely down occasionally to maintain battery health. If the run time continues to decrease, consider replacing the battery.
5. Stuck or Unresponsive Buttons
Buttons that do not respond when pressed might be stuck due to dirt or debris buildup. Carefully clean around the buttons with a dry cloth or a small brush to restore their functionality. Avoid using water or harsh cleaning agents that could damage the device.
By regularly maintaining your vacuum cleaner and addressing these common problems promptly, you can ensure its effective performance and extend its lifespan.
Maximizing Battery Life and Performance
To ensure your device operates efficiently and the battery remains in optimal condition, it’s essential to follow specific practices that enhance longevity and functionality. Regular maintenance and mindful usage can significantly impact both the battery’s lifespan and the overall performance of the appliance. By implementing a few key strategies, you can maximize the efficiency of your equipment and extend the time between charges.
One crucial aspect is to avoid overcharging the battery. Unplugging the device once it reaches a full charge helps prevent strain on the battery and reduces the risk of degradation. Additionally, it’s beneficial to use the equipment regularly rather than letting it sit idle for extended periods. Frequent use helps keep the battery in good health and prevents issues related to inactivity.
Keeping the device clean is another important factor. Regularly removing dust and debris from the filters and other components ensures smooth operation and prevents unnecessary stress on the battery. Furthermore, storing the equipment in a cool, dry place avoids exposure to extreme temperatures that can adversely affect battery performance.
Lastly, employing the device on appropriate settings can also conserve battery life. Opting for lower power modes when possible reduces energy consumption and helps preserve the charge for longer periods. By adhering to these practices, you will not only enhance the performance of your device but also extend its battery’s lifespan, ensuring reliable operation over time.