Modern tools are designed to simplify our daily tasks, ensuring accuracy and efficiency in various operations. The enhanced Version 2.0 device offers a range of features that cater to both novices and seasoned users, delivering precise results in every application. This article provides a detailed look into the functionalities and setup process, empowering users to fully utilize the device’s capabilities.
Whether you’re adjusting settings for the first time or looking to optimize performance, understanding the full scope of this tool’s features is essential. The following sections will walk you through each step, offering clear instructions and helpful tips to ensure you get the most out of your experience. This guide aims to make your journey with the Version 2.0 tool both intuitive and straightforward.
From initial setup to advanced configurations, this document covers all the essential information you need. It’s structured to be easy to follow, with practical insights and troubleshooting advice. By the end of this guide, you’ll be fully equipped to handle the device with confidence and precision.
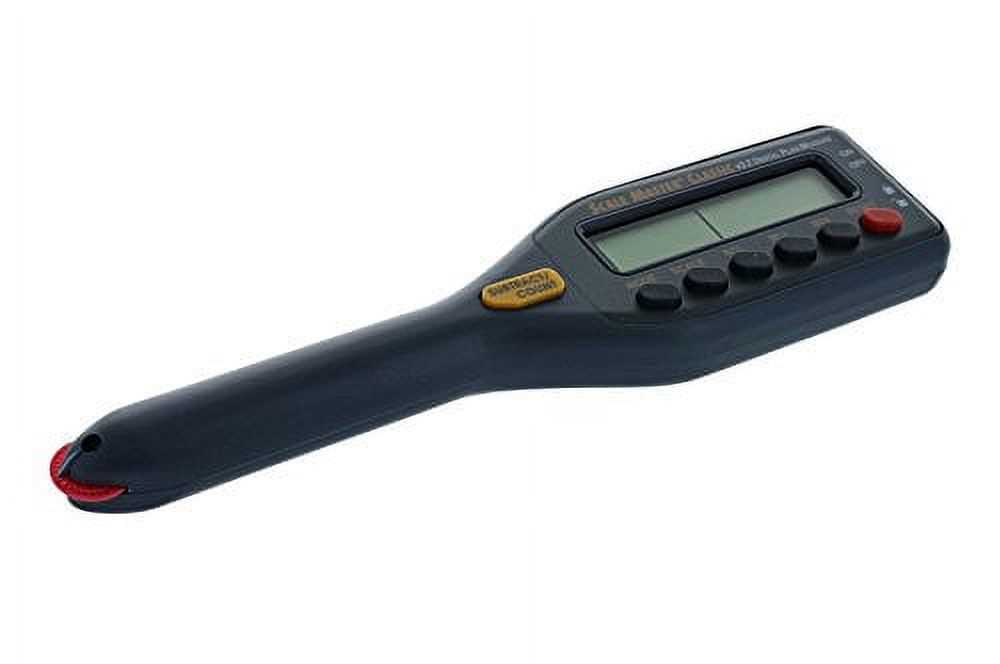
Overview of the Scale Master Classic V2.0
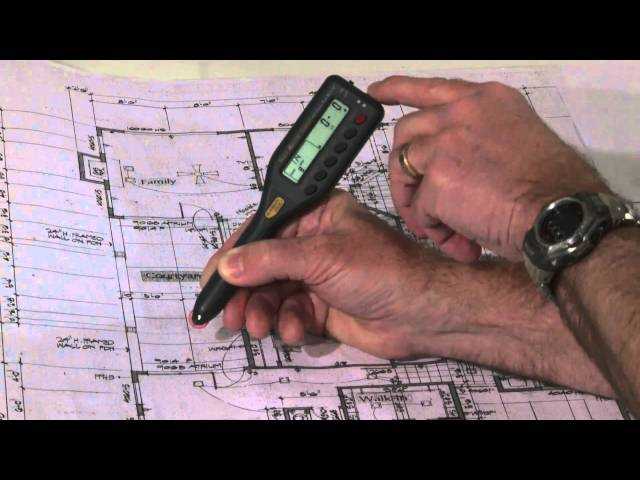
The device in question is a specialized tool designed to streamline measurements for professionals. Its primary function is to assist in the accurate translation of scaled drawings into real-world dimensions, making it an essential instrument for those who frequently work with technical plans.
Key Features
This tool is equipped with a variety of features that enhance its usability and accuracy. The device offers multiple unit conversions, enabling users to switch between different measurement systems seamlessly. It also includes pre-set scales and the ability to create custom units, providing flexibility for diverse project requirements.
| Feature | Description |
|---|---|
| Pre-set Units | Pre-configured units for common measurement systems, allowing for quick setup and use. |
| Custom Unit Creation | Enables the creation of personalized measurement units tailored to specific project needs. |
| Automatic Calculation | Instantly converts measurements to their real-world equivalents, reducing manual calculation errors. |
Applications
This tool is especially valuable for professionals in architecture, engineering, and construction. It significantly improves the efficiency of tasks such as calculating distances, areas, and volumes from technical drawings, ensuring that projects are executed with precision and speed.
Getting Started with Your Device
Before you begin using your new equipment, it’s essential to familiarize yourself with the basic functions and setup process. This section will guide you through the initial steps, ensuring that you can quickly and efficiently start working with the device.
First, ensure that all components are included in the package. Carefully unpack the contents and place them on a clean, flat surface. Check that everything is intact and undamaged.
Next, connect your device to a power source using the provided cable. Make sure the connection is secure and that the power outlet is functioning correctly. Once connected, locate the power button and turn on the device.
As the system boots up, observe any indicators or display screens. These will provide you with information on the device’s current status. If necessary, adjust the settings to suit your needs by following the prompts or consulting the user interface.
Finally, take a few moments to familiarize yourself with the controls and features. Explore the various functions available, so you feel comfortable operating the device in different scenarios. This foundational knowledge will enable you to utilize your equipment effectively and with confidence.
Key Features and Functionalities Explained
This section provides an in-depth overview of the essential elements and capabilities of the device. Understanding these core aspects will help users make the most of the tool, ensuring they can leverage its full potential for their specific needs. We will cover the primary functions, unique characteristics, and the practical benefits that make this device a valuable asset.
Precision and Accuracy
One of the standout features of this device is its ability to deliver highly precise measurements. Accuracy is paramount, and this tool is designed to meet the highest standards. It ensures reliable and consistent results, making it suitable for various professional applications. Whether you are dealing with complex tasks or simple ones, the precision offered here is unmatched.
User-Friendly Interface
The tool is equipped with an intuitive interface that simplifies operation for users of all experience levels. The layout is thoughtfully designed, providing easy access to all necessary functions. Even beginners can quickly become proficient, while experienced users will appreciate the streamlined workflow. Additionally, the interface is responsive, ensuring smooth interactions and minimizing the learning curve.
Versatility is another key attribute, allowing the device to adapt to a wide range of tasks. Whether you’re working in a professional setting or on personal projects, the tool offers the flexibility needed to handle diverse requirements effectively. This adaptability is further enhanced by customizable settings that cater to individual preferences, providing a tailored experience for each user.
Step-by-Step Calibration Guide
Accurate measurements are essential for reliable performance. This section provides a comprehensive guide to fine-tuning your device to ensure it delivers precise results every time. Follow these instructions carefully to maintain optimal functionality.
Preparing Your Device
Before beginning the adjustment process, ensure that your device is placed on a stable, level surface. Remove any obstructions or debris that could interfere with the procedure. Make sure the device is powered on and has been allowed to warm up for a few minutes to achieve a stable operating temperature.
Calibration Process
Start by accessing the settings menu on your device. Look for the option that allows you to initiate the adjustment process. Once located, select this option, and follow the on-screen prompts to proceed. You may need to use a specific reference weight or object during this stage. Ensure that the reference is accurate and placed correctly on the device’s platform. The system will guide you through each step, confirming the adjustments as you proceed.
Final Check: After completing the adjustment process, it’s crucial to verify the accuracy of the calibration. Use a different reference object or weight to test the measurements. If the readings are consistent with the known values, your device is now ready for use.
If discrepancies are found, repeat the process to ensure precise tuning. Regular adjustments are recommended to maintain accuracy over time.
Advanced Tips for Accurate Measurements
Ensuring precision in your measurements requires more than just basic familiarity with your device. By employing a few advanced techniques, you can greatly improve the reliability and consistency of your results.
Optimizing Environmental Conditions
Temperature and humidity can significantly impact measurement accuracy. It’s essential to work in a stable environment where these factors are controlled. If possible, allow your device to acclimate to the room conditions before starting your measurements. This minimizes errors caused by thermal expansion or moisture absorption.
Proper Handling and Calibration

Even slight mishandling can introduce errors. Always use a gentle touch and ensure your device is properly supported on a flat, vibration-free surface. Regular calibration is critical; it ensures that the readings remain accurate over time. Use certified calibration weights or follow the manufacturer’s guidelines to maintain precision.
Attention to Detail is key in achieving consistent accuracy. Avoid abrupt movements or changes in the measurement setup, as these can disrupt the readings. For critical tasks, consider taking multiple readings and averaging them to reduce the influence of any anomalies.
Troubleshooting Common Issues
Addressing frequent problems effectively ensures smooth operation of your device. This section provides solutions for some of the most commonly encountered difficulties. By following these guidelines, you can quickly resolve issues and maintain optimal performance.
| Issue | Possible Cause | Solution |
|---|---|---|
| Device not powering on | Battery is drained or improperly connected | Check the battery level and connections. Replace or recharge the battery if necessary. |
| Inaccurate readings | Calibration needed or device on an uneven surface | Calibrate the device as per the guidelines and ensure it is placed on a stable, flat surface. |
| Buttons not responding | Possible dirt or debris around buttons | Clean the buttons gently with a dry cloth. If the issue persists, contact customer support for further assistance. |
| Display issues | Screen brightness set too low or damaged screen | Adjust the screen brightness settings. If the display remains problematic, consider having the screen inspected or replaced. |